I have had this pattern in my stash for two years along with the fabric while I was building up the courage to tackle making a coat. Despite the fact that the pattern said Very Easy I still hesitated because this has been one of the more expensive garments that I have made.
Pattern Description: Lined coats in two lengths. Bodice has princess seams, A-line skirt, closure variations and sleeves in two lengths. A, B: topstiching. B,C: cording button loops; B, C: length is 2 inches above mid-knee. I made view C
Pattern Sizing: Available in 6-22. I cut an 18 in the bust and graded to a 20 in the skirt.
 |
| The finished product |
Were the instructions easy to follow? As many reviewers have previously stated, you can ignore the construction order for this coat. Assemble the coat, then lining, and bag it to save yourself endless hand stitching and to get a more professional looking inside. I followed this method to bag my lining which result in NO hand-stitching.
 |
| Before attaching lining |
 |
| All bagged |
 |
| Back view of lining |
What did you particularly like or dislike about the pattern? I really like how well this pattern was drafted. All of the seam lines matched up beautifully. I also really like the collar of this coat, although I chose to make the more tame version of the three. I just didn't think the wide collar would suit my body shape.
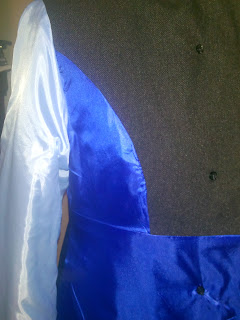
Fabric Used: A black/dark gray wool blend for the coat. I also underlined all of the pieces with black flannel for warmth and stability. I used a royal blue china silk left over from Vogue 1030 for the skirt and bodice pieces. I used a light blue poly lining for the sleeves. I opted to use poly lining because to me it offered more 'movement' which I felt was necessary in the arms.
 |
| Here you can see the flannel I used to understitch the coat with |
Pattern Alterations or any design changes you made: I bagged the lining like many others. I also underlined the entire coat. I ended up taking about 2 inches off the collar, otherwise I looked like a turtle peeking out of its shell. I also added pockets to this coat. I can't have a coat without pockets. Where am I supposed to put my gloves, or my phone, or my hands for that matter? In browsing a different coat review I saw where someone added 'pocket stays' to their garment. I am not sure if that is the correct term but that's what I remember them as. I used ribbon for mine and added them to the top and bottoms of the pocket to keep it from drooping or flipping out.
 |
| pockets! |
 |
| View of pinned pocket stays |
Would you sew it again? Would you recommend it to others? I do not plan to sew this again but I highly highly recommend it to others.
 |
| Close up of buttons |
Fabric:
2.5 yds of Wool blend coating @ 9.98/yd (-15% off)=$21.21
2.75 yds of black flannel @3.74/yd(-15%off)=$8.74
4- 1 3/8 buttons @ .97/ea=$3.88
2 yds of china silk lining leftover from Vogue 1030
Notions: thread, cording, ribbon, and interfacing from my stash
Total: $33.83
 |
| I added this hook and eye which prevents drooping and stress on the cording |


2 comments:
You did an amazing job on this! Love the details like the pinned pockets. Wow!
Your coat turned out very nice. I'm making this view too.
Post a Comment